Football headbands and wristbands serve practical performance functions that extend beyond their often-perceived role as purely aesthetic accessories — headbands prevent sweat from running into the eyes during intensive physical activity, wristbands provide convenient sweat absorption for wiping the face during play, and both accessories contribute to player comfort during hot-weather training and competitive matches where perspiration management directly affects visual clarity, grip confidence, and overall playing comfort throughout sustained physical exertion. While not mandatory equipment, headbands and wristbands have become increasingly popular across all competitive levels as players recognize the genuine practical benefits these simple accessories provide during demanding athletic performance.
This comprehensive guide examines football headbands and wristbands across all available types and material options, covering the specific functional benefits each accessory provides during football activity, material technologies that optimize moisture absorption and management, sizing and fit considerations for comfortable and secure wearing during vigorous physical activity, competition regulations governing accessory use in organized football, style and color selection for team coordination, youth player considerations, care and maintenance guidance, and practical purchasing recommendations for players, coaches, and teams selecting accessory equipment that enhances comfort and performance during training sessions and competitive matches throughout every season and weather condition.
Headband Functions
Sweat Management
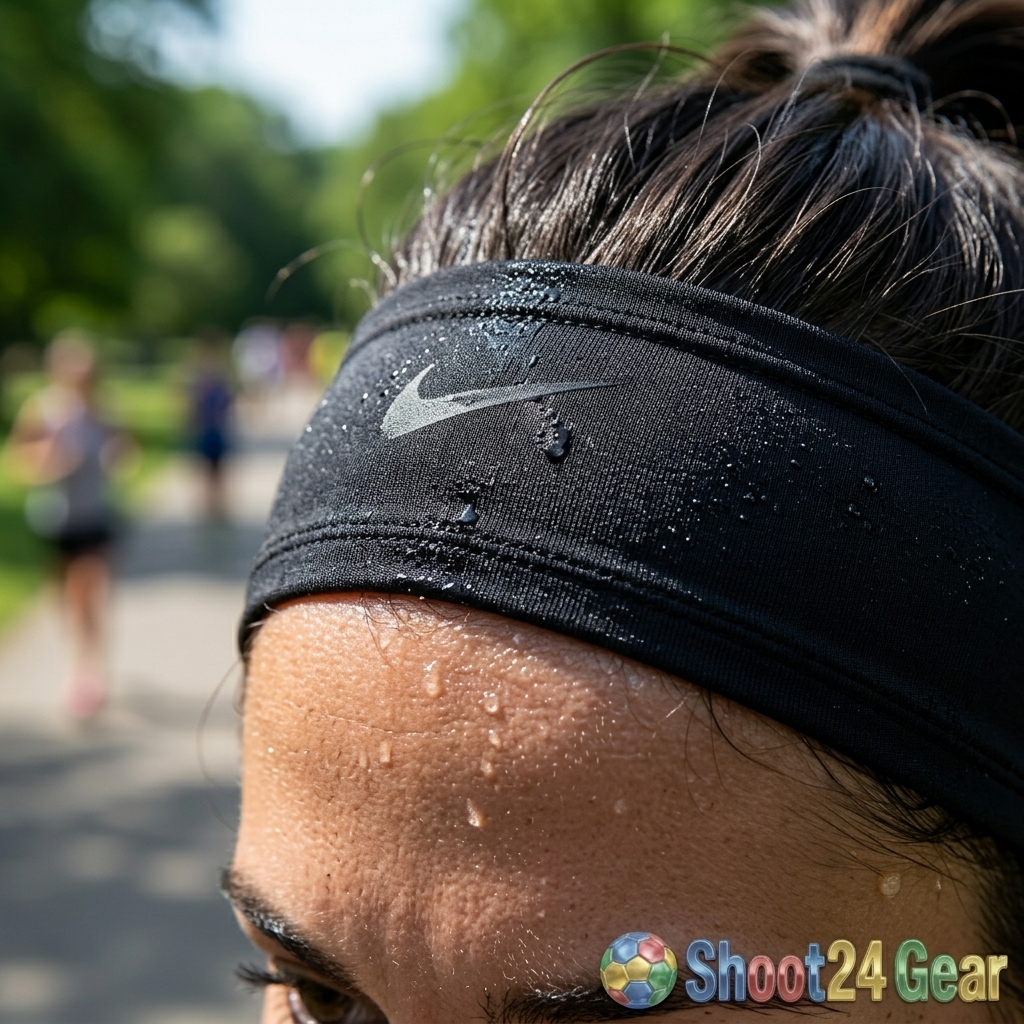
The primary functional purpose of football headbands is preventing perspiration from reaching the eyes during intense physical activity. Sweat running into the eyes causes stinging, blurred vision, and involuntary blinking that temporarily impairs visual clarity — directly affecting the ability to track the ball, read play, and make accurate decisions during the split-second situations that competitive football continuously presents. Headbands positioned across the forehead intercept sweat before it reaches the eye area, absorbing moisture into the headband material rather than allowing it to flow downward across the face.
This sweat management function is most valuable during hot-weather matches and intensive training sessions where sweat production rates are highest. Players with higher natural perspiration rates or those who find sweat particularly disruptive to their vision benefit most significantly from consistent headband use. The effect on visual comfort is immediate and noticeable — players who adopt headband use during hot-weather activity typically report significant improvement in visual comfort that they are reluctant to forgo in subsequent sessions.
Hair Management
Headbands secure longer hair away from the face during play, preventing hair from obscuring vision or interfering with heading technique. Players with medium to long hair who do not tie their hair back completely benefit from headbands that keep hair positioned away from the face without the discomfort or inconvenience of tighter hair ties that can create pressure headaches during extended wearing periods. Headbands accommodate various hairstyles while maintaining functional hair control throughout the physical demands of football training and match play.
Wristband Functions
Face wiping: Wristbands provide convenient sweat-absorbing surfaces on the wrists that players use to wipe perspiration from the face during natural play stoppages. This face-wiping function complements headband sweat prevention by addressing perspiration that accumulates despite headband use or for players who prefer wristband-based sweat management over headband wearing.
Hand moisture management: Wristbands absorb perspiration from the forearms before it reaches the hands, maintaining drier hand surfaces that affect grip confidence. While primarily relevant for goalkeepers whose grip directly affects performance, outfield players also benefit from reduced hand moisture during throw-in execution and general ball handling situations where grip affects performance outcomes.
Material Technologies
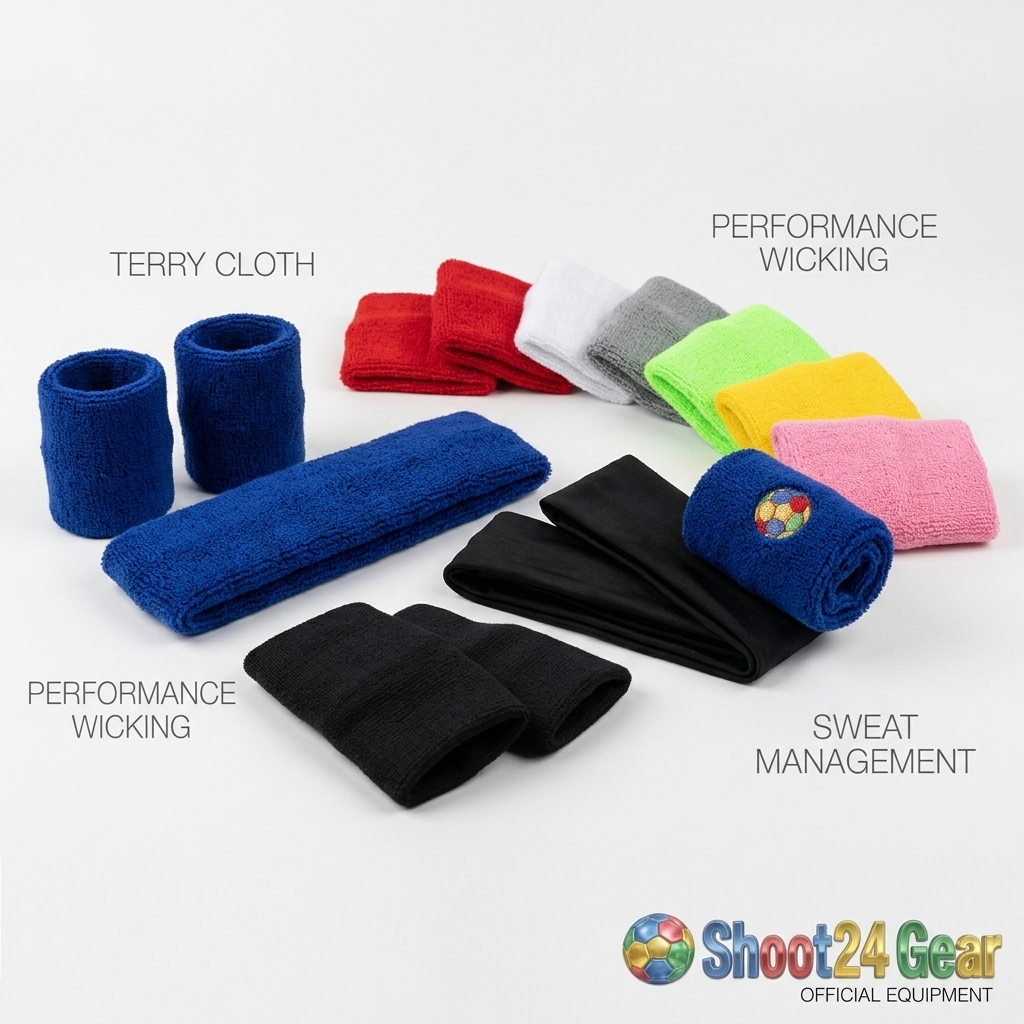
Terry cloth (toweling): Traditional terry cloth headbands and wristbands provide maximum moisture absorption through the looped fiber construction that creates significant moisture-holding capacity. Terry cloth absorbs perspiration effectively and provides the soft, comfortable feel that has made it the standard material for sweat management accessories across all sports for decades. The primary limitation of terry cloth is its tendency to become saturated during extended heavy perspiration, eventually reducing absorption capacity as the material reaches its moisture-holding limit.
Moisture-wicking synthetics: Modern performance headbands and wristbands use synthetic materials engineered to transport moisture away from the skin surface for evaporation rather than absorbing and retaining it within the material structure. Moisture-wicking designs remain lighter and more effective during prolonged activity because they continuously move moisture to the outer surface for evaporation rather than accumulating moisture weight within the fabric. Performance synthetic headbands and wristbands maintain their moisture management function throughout extended training sessions and full matches more consistently than absorbent terry cloth alternatives that progressively saturate.
Silicone-lined designs: Some headbands incorporate silicone grip strips on the interior surface that prevent slippage during vigorous physical activity. Standard fabric headbands can slide upward or backward during running, jumping, and heading movements, requiring manual repositioning that interrupts concentration and play involvement. Silicone-lined headbands maintain position more reliably, reducing the need for mid-play adjustments that break focus and interfere with consistent performance.
Sizing and Fit
Headband sizing: Headbands should fit snugly around the forehead without creating excessive pressure that causes headaches during extended wear. Most performance headbands use elastic construction that accommodates a range of head circumferences through stretch. Adjustable headbands with Velcro or tie closure provide more precise fit customization than one-size elastic designs that may be too tight for larger heads or too loose for smaller heads.
Wristband sizing: Wristbands should fit comfortably around the wrist without sliding or constricting. Standard elastic wristbands accommodate most wrist sizes through stretch, but players with particularly thin or thick wrists should verify fit before purchasing to ensure comfortable, functional wearing during extended match and training use.
Competition Regulations
FIFA Laws of the Game permit headbands and wristbands provided they pose no danger to the wearer or other players. Accessories must be soft and non-abrasive — no hard plastic, metal, or rigid components that could cause injury during contact. Color restrictions vary between competitions — some leagues require accessories to match the team shirt color or be black or white. Verify competition-specific accessory regulations before match use to ensure compliance with the relevant competition’s equipment requirements and avoid potential equipment infractions.
Goalkeepers face specific headband considerations — headband material and construction must not interfere with goalkeeping glove contact or heading ability. Most standard fabric headbands comply naturally with these requirements, but unusually thick or structured headbands should be evaluated for potential interference with goalkeeping-specific movements before adoption for competitive match use.
Style and Color Selection
Team coordination: Selecting headband and wristband colors that match team kit creates coordinated team appearance that enhances professional presentation. Black, white, and team primary colors provide the most versatile options that complement various kit combinations throughout home and away fixture schedules. Coordinated accessory colors across the team create a unified visual impression that reflects positively on team organization and attention to presentation detail.
Personal expression: Within competition regulations, headband and wristband selection provides an opportunity for personal expression that individualized equipment like boots also serves. Distinctive headband styles, colors, and wearing preferences become associated with individual players’ on-pitch identities, contributing to the personal brand and visual recognition that players develop throughout their competitive careers.
Youth Player Considerations
Safety: Youth headbands should use soft, flexible materials with no rigid components — the safety requirements that apply to adult accessories are even more important for developing players whose bodies are more vulnerable to accessory-related injury. Simple elastic fabric headbands provide the safest option for youth players, avoiding designs with adjustable mechanisms or structural elements that could pose injury risk during youth football’s characteristically enthusiastic and sometimes imprecise physical contact.
Size availability: Youth-specific sizing ensures appropriate fit for smaller heads and wrists. Adult accessories on youth players fit poorly — oversized headbands slide during activity and oversized wristbands interfere with hand function. Dedicated youth sizes provide comfortable, effective accessory wearing for younger players who benefit from sweat management during physical activity.
Goalkeeper-Specific Applications
Goalkeepers derive particular benefit from headband use because visual clarity is exceptionally critical for the shot-stopping, aerial claiming, and distribution reading that goalkeeping demands. Even momentary sweat-induced visual impairment during a shooting opportunity can mean the difference between a save and a goal conceded. Many professional goalkeepers adopt consistent headband use specifically for the visual clarity benefit during competitive matches where every visual advantage contributes to performance quality.
Wristbands serve goalkeepers as convenient glove-wiping surfaces — wiping goalkeeper glove palms on absorbent wristbands removes moisture buildup that degrades glove grip during sustained wet or hot-weather conditions. This glove maintenance function extends the effective grip performance of goalkeeper gloves throughout matches by providing regular moisture removal without requiring towels or external wiping surfaces.
Care and Maintenance
Washing: Machine wash headbands and wristbands after every use — these accessories accumulate significant perspiration, skin oils, and bacteria during each wearing. Warm water with athletic detergent effectively cleans both terry cloth and synthetic accessories. Air dry to preserve elastic integrity and material structure that machine drying heat may degrade.
Replacement: Replace accessories when elastic stretch diminishes, material absorption capacity noticeably decreases, or fabric integrity shows visible degradation. Performance headbands and wristbands typically last three to six months of regular competitive use before requiring replacement due to progressive elastic and material degradation.
Weather-Specific Applications
Hot weather: Headband importance increases significantly during hot-weather activity when sweat production rates rise dramatically. Players who do not normally use headbands during temperate conditions often adopt them during summer matches and hot-weather training when perspiration volumes exceed what natural facial evaporation can manage. Lightweight, moisture-wicking headbands provide optimal hot-weather performance by transporting sweat for evaporation rather than absorbing and retaining heat-trapping moisture against the forehead.
Cold weather: Thicker headbands provide ear coverage and thermal insulation during cold-weather training and matches. Fleece-lined or wool-blend headbands combine sweat management with warmth retention, serving dual function as both perspiration control and thermal protection accessories during winter football. Wider headband designs that cover the ears provide meaningful warmth benefit during exposed outdoor training in cold and windy conditions.
Rainy conditions: Headbands provide limited but meaningful rain management by preventing rainwater from running directly into the eyes from the forehead and hair. While headbands cannot fully protect against heavy rain, they provide a physical barrier that redirects some rainwater away from the immediate eye area, contributing to marginally improved visual comfort during wet-weather competitive play.
Budget Considerations
Entry level: Basic terry cloth headbands and wristbands are among football’s most affordable accessories — providing genuine functional benefit at minimal cost. Even budget headbands effectively prevent sweat reaching the eyes, making basic sweat management accessible to players at every budget level without requiring premium product investment for fundamental functional benefit.
Performance tier: Moisture-wicking synthetic headbands with silicone grip features and ergonomic design provide enhanced performance at moderate pricing. Performance accessories maintain effectiveness throughout extended activity more consistently than basic alternatives, justifying the modest price premium for competitive players who rely on sustained sweat management during full training sessions and ninety-minute matches.
Team sets: Purchasing coordinated headband and wristband sets for the entire team creates uniform appearance at bulk-purchase pricing that provides per-unit savings compared to individual purchases. Team sets typically offer color coordination options that simplify team-wide accessory matching with kit colors for consistent professional presentation across all squad members.
Common Accessory Mistakes
Too tight: Headbands worn excessively tight create pressure headaches that worsen through extended wearing during training and match play. Adjust headband fit to provide secure positioning without uncomfortable compression — the headband should stay in place through light elastic tension rather than tight constriction that creates progressive discomfort over time.
Wrong material for conditions: Using absorbent terry cloth in heavy perspiration conditions leads to saturated, heavy headbands that become uncomfortable and cease providing effective sweat management. Similarly, using thin moisture-wicking headbands in cold weather provides insufficient thermal protection. Match material selection to the conditions you will encounter during each specific training session or match for optimal accessory performance.
Neglecting washing: Headbands and wristbands accumulate significant bacteria from perspiration and skin contact. Wearing unwashed accessories introduces bacteria against the skin and near the eyes, creating potential hygiene and skin health concerns. Wash accessories after every single use to maintain hygienic wearing conditions throughout the competitive season.
Historical Context
Headbands became prominent in football during the nineteen seventies and eighties when several high-profile players adopted distinctive headband styles that became iconic visual elements of their playing identity. These pioneering headband-wearing players demonstrated that accessory use could combine practical function with personal expression, establishing a tradition of headband use that has grown consistently across subsequent decades of professional and amateur football worldwide.
Wristbands similarly gained popularity through the influence of prominent players who wore them during televised matches, creating visibility that inspired adoption across all competitive levels. The combination of visible professional endorsement and genuine practical benefit has firmly established headbands and wristbands as widely accepted, fully mainstream football accessories rather than unusual or purely cosmetic additions to standard football equipment.
Psychological Benefits
Beyond measurable physical benefits, headbands and wristbands provide psychological comfort through the confidence of knowing that sweat management is addressed and visual clarity will be maintained throughout demanding physical activity. This preparedness confidence allows players to focus entirely on competitive performance without the background concern of impending sweat-related visual disruption that can create subtle but persistent distraction during intensive match play.
Many players develop strong attachment to their preferred headband style and wearing routine — the accessory becomes part of their pre-match preparation ritual that contributes to mental readiness and competitive confidence. This ritualistic significance, while subjective, represents a genuine psychological performance factor for players whose preparation routines contribute to their competitive mindset and match-day mental readiness.
Training Applications
Headband and wristband use during training provides the same functional benefits as match-day wearing — sweat management, visual clarity, and comfort enhancement that support training quality and intensity. Players should train with the same accessories they intend to wear during matches to ensure familiarity and comfort consistency between training and competitive environments. Introducing unfamiliar accessories on match day can create unexpected distraction or discomfort that training-phase adoption would have identified and resolved prior to competitive use.
Purchasing Recommendations
Individual players: Purchase a minimum of three headbands and three wristbands to enable rotation that allows thorough washing and drying between uses. Multiple accessories ensure that clean, dry options are always available regardless of washing schedules or unexpected consecutive training sessions that prevent complete drying between uses.
Clubs and teams: Invest in team-coordinated accessory sets that provide uniform appearance alongside functional sweat management benefits. Budget for seasonal replacement as accessories degrade through sustained competitive use, and maintain spare inventory for new players or replacement needs that arise during the competitive season.
Summary
Football headbands and wristbands provide practical sweat management, visual clarity preservation, and comfort enhancement that support consistent performance during intensive training and competitive match play. Select appropriate materials based on your sweat management preference — absorbent terry cloth for maximum moisture retention or moisture-wicking synthetics for sustained performance during extended activity.
Always ensure full compliance with applicable competition accessory regulations, select colors that coordinate with team kit requirements, and maintain accessories through regular washing and timely replacement that preserves their functional effectiveness throughout competitive use.